How to bridge to Blast: The L2 with native yield

An Intro to Blast
Before bridging to Blast, let’s learn more about one of the newest Ethereum L2s.
What is Blast?
Blast is the only Ethereum L2 with native yield for ETH and stablecoins, brought to you by the creators of NFT Marketplace, Blur. Blast is known for its one-of-a-kind native yield model, which allows certain token holders to generate passive income. Yield is earned in ETH, USDC, USDT, and DAI, and can also be earned by holding these tokens in your wallet
Where does Blast yield come from?
Blast native yield comes from ETH staking and RWA protocols. How 3 primary yield functions of Blast work:
- Auto rebasing: ETH natively rebases on Blast as users transact in ETH and dapps are built around ETH.
- L1 staking: ETH yield from L1 staking, initially Lido, is automatically transferred to users via rebasing ETH on the L2.
- T-Bill Yield: When you bridge stablecoins to Blast, you receive USDB. USDB is Blast’s auto-rebasing stablecoin. MakerDAO’s on-chain T-Bill protocol provides 5% yield on USDB. When you bridge back to Ethereum from Blast, your USDB can be redeemed for USDC.
Bridging Guide to Blast
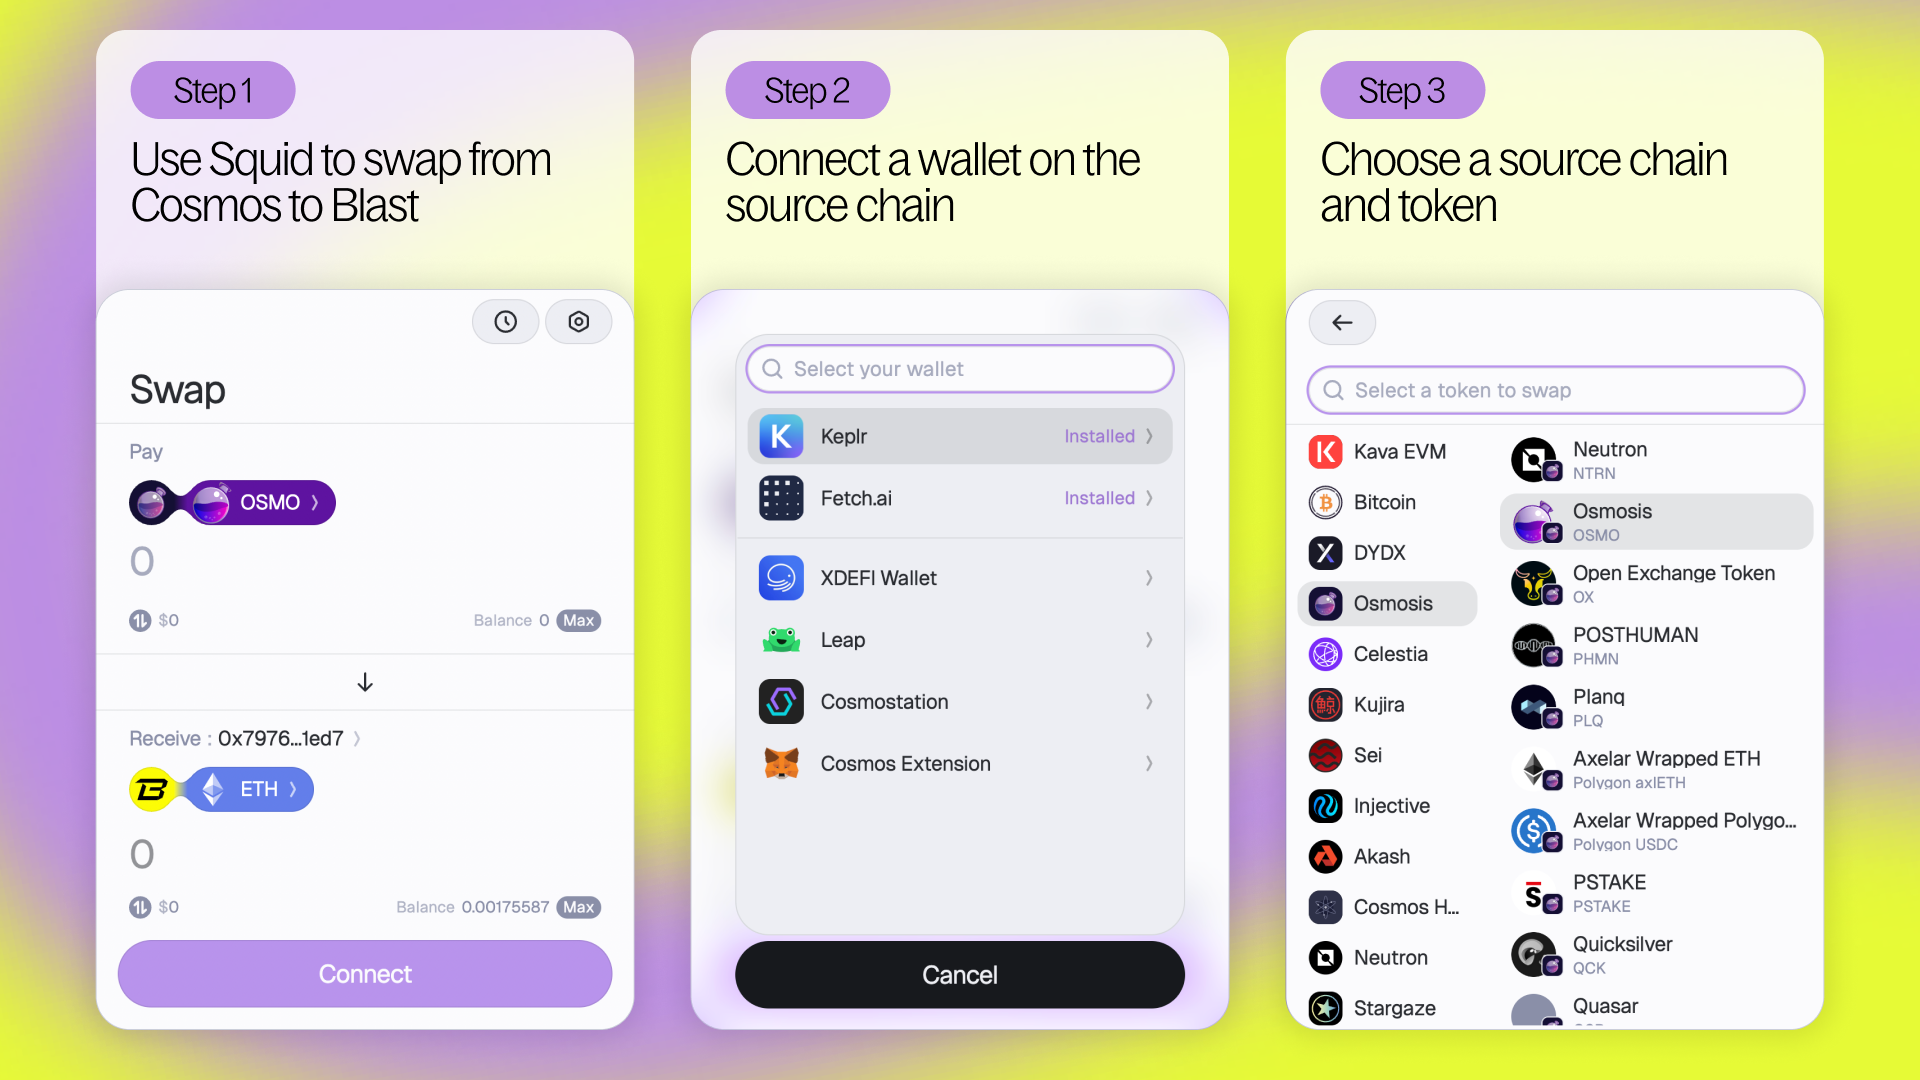
Interested in bridging to Blast? Use Squid and directly swap into Blast from separate chains - swaps into Blast are supported both from EVM and Cosmos chains!
Swap into Blast from any chain
Step 1 - Go to app.squidrouter.com and check that you’re using Squid v1.
Step 2 - Click the ‘connect wallet’ button to connect a supported wallet to Squid.
Note: Find a list of Squid-supported wallets here.
Step 3 - Once you’ve connected your wallet, click the chain labeled ‘From’ to search for or scroll to find and select the chain you’re swapping from. You can also select the source token you’ll be using, if it’s different than the native source token.

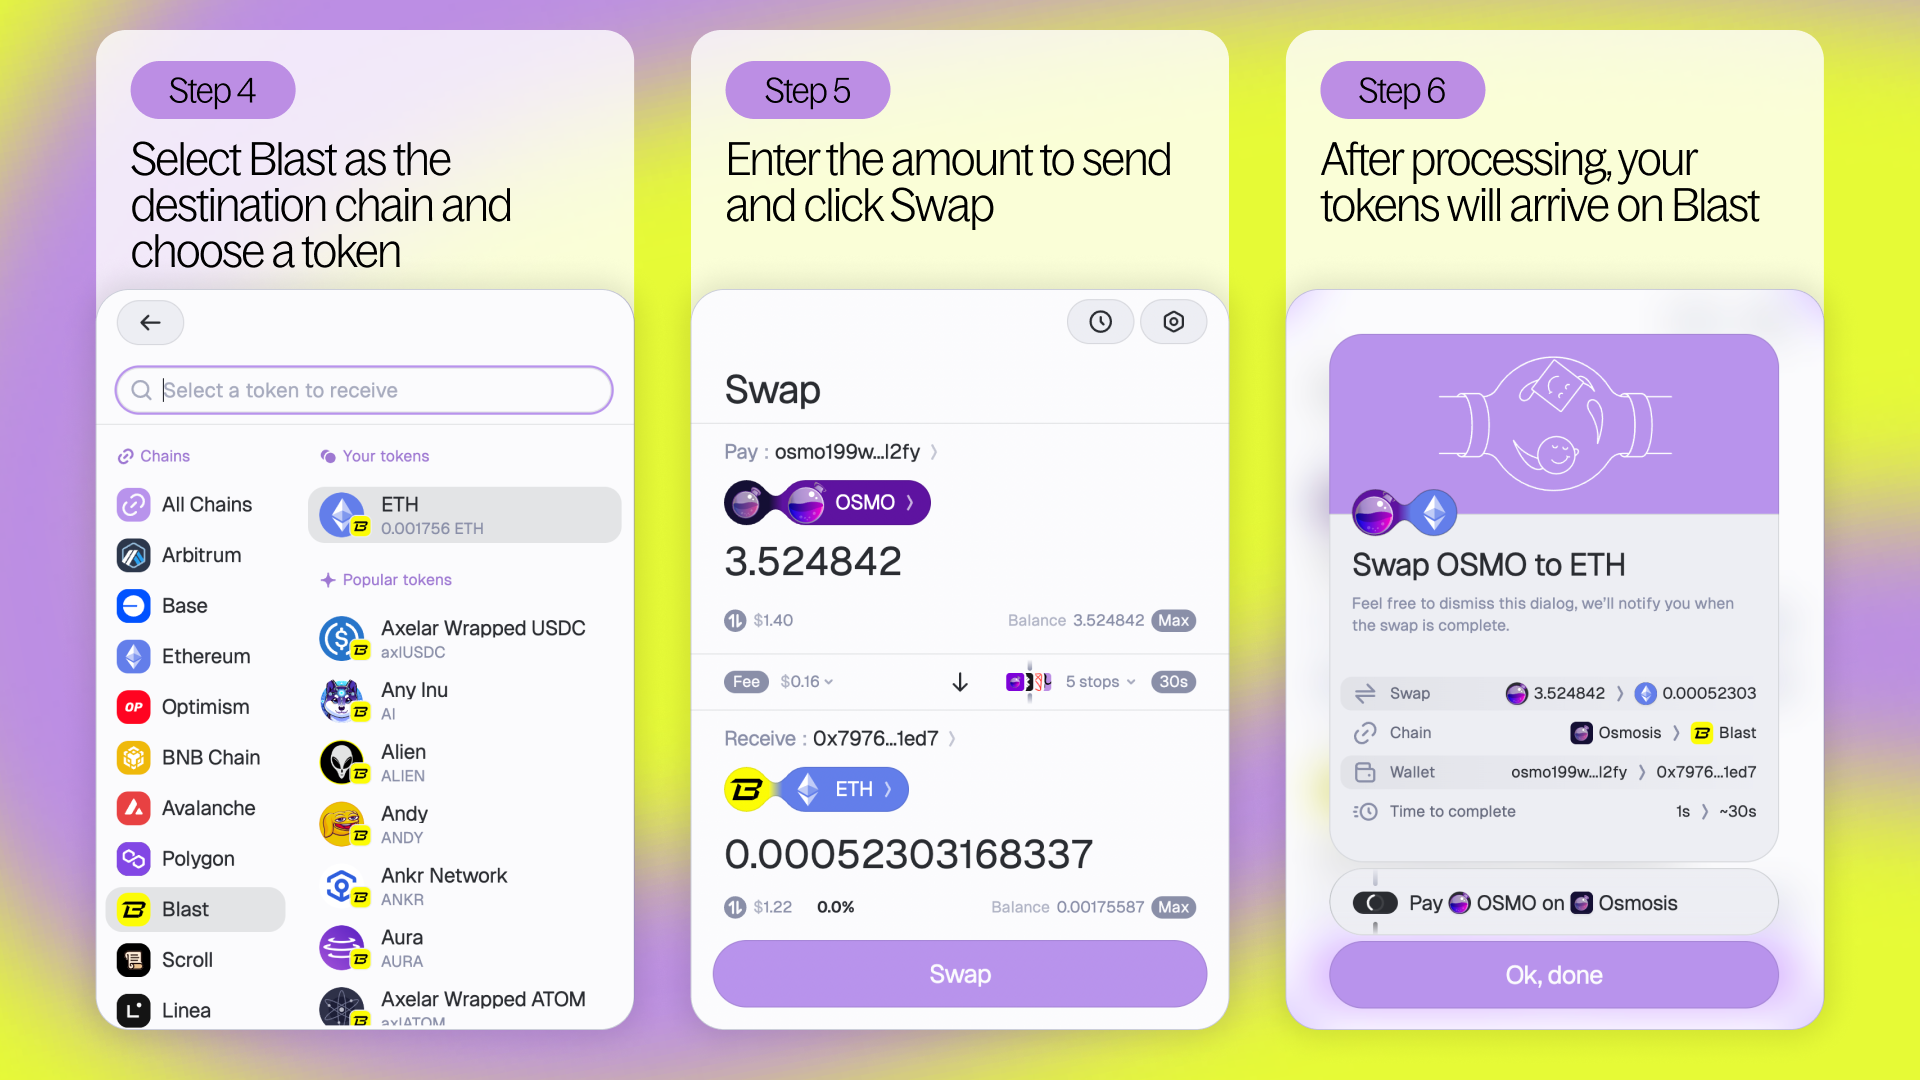
Step 4 - If you’re bridging from a Cosmos chain, you will need to click ‘Add Address+’ to select the destination wallet address that you’ll be using on Blast.
Step 5 - Then search for and select Blast as your destination chain, along with the destination token.
Step 6 - Enter the amount you’d like to send and click Submit. Your tokens will now be on their way!
